If you’ve just bought a Brita Cube water filter pitcher, or you’ve had one sitting on the counter and are still not quite sure whether the filter is doing its job, you’re not alone. Pitcher filters look simple, but getting the best performance from them depends on a few details: proper setup, regular cleaning, and filter replacement on schedule. Skip those steps, and you can end up with stale-tasting water, slower flow, and a pitcher that is more “kitchen ornament” than filtration tool.
This guide walks through how to use, clean, and maintain a Brita Cube pitcher properly, with a practical eye on what matters most: safe storage, consistent filtration, and good water hygiene. It also helps set realistic expectations. A standard Brita pitcher can improve taste and reduce some contaminants, but it is not the same as a certified treatment system for PFAS or other persistent pollutants. If you are filtering water because of specific contamination concerns, that distinction matters.
What the Brita Cube pitcher is designed to do
The Brita Cube is a countertop pitcher filter made for everyday tap water use. Its main role is to reduce chlorine taste and odour, and depending on the filter type used, it may also reduce some metals and other common tap-water impurities. In practice, that means better-tasting water for drinking, tea, coffee, and cooking.
What it does not do is turn all water into lab-grade purified water. That’s not a flaw; it’s a limitation of the product category. Pitcher filters are convenient and affordable, but they are generally small-scale systems with a short contact time between water and filter media. If your concern is PFAS, nitrates, arsenic, or microbiological contamination, you need to check the manufacturer’s claims and independent certification very carefully.
A good habit is to read the package insert for your specific filter cartridge, not just the pitcher instructions. Brita product names can vary by region, and performance depends on the exact cartridge model.
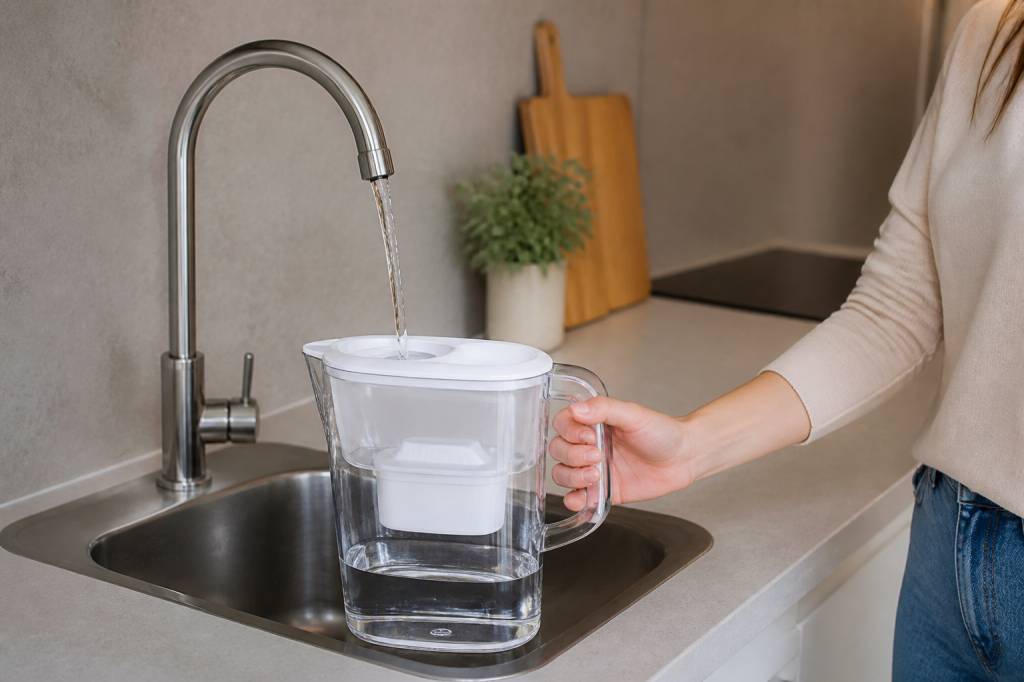
How to set up your Brita Cube for first use
Before you fill it for the first time, wash the pitcher, lid, and reservoir with warm water and mild dish soap. Rinse thoroughly. Avoid harsh abrasives or strong chemicals; they can scratch plastic surfaces or leave behind residue that affects taste.
Then prepare the filter cartridge as instructed for your model. In many Brita systems, this means rinsing or soaking the cartridge before inserting it. The goal is to remove loose carbon dust and help the filter start working properly. If you’ve ever poured your first filtered glass and noticed grey specks, that’s usually activated carbon fines. Annoying? Yes. Dangerous? Usually no. Still, it’s a sign the cartridge needed a proper rinse.
Once prepared, place the cartridge in the reservoir and press it into position until it seats firmly. Fill the reservoir with cold tap water and allow the first full pitcher to filter through. For many filters, the first one or two batches are best discarded, especially if the manufacturer recommends doing so. This helps flush any residual dust or manufacturing trace materials.
If your pitcher has a filter indicator, reset it now. That small step is easy to forget, and a forgotten indicator can lead to a cartridge being used long after its effective life.
How to use the pitcher day to day
Using the pitcher is straightforward, but a few habits improve both hygiene and performance.
- Use cold tap water only. Hot water can damage the cartridge or reduce performance.
- Refill the reservoir as needed, but don’t overfill beyond the max line.
- Store the pitcher in the refrigerator if possible, especially in warm weather.
- Keep the lid closed to reduce exposure to dust and airborne particles.
- Pour filtered water regularly so it does not sit unused for long periods.
If you leave filtered water standing for days, especially at room temperature, taste can deteriorate and microbial growth becomes more likely. That is not unique to Brita; it’s a general water-storage issue. Filtered water is still water, and water is not immortal.
Another practical point: filter pitchers work best when they are used frequently. A cartridge that sits dry or sits with stagnant water for too long may not perform as expected. If you are away for several days, empty the pitcher, rinse it, and start fresh when you return.
How often to replace the filter
Brita cartridges are designed for a limited amount of water, after which performance declines. Replacement timing depends on the specific cartridge and your local water quality. Many standard filters are intended to be replaced after a certain number of weeks or after filtering a specific volume, whichever comes first.
Why does this matter? Because once the media is exhausted, the filter may no longer reduce the intended contaminants effectively. In some cases, flow slows down before the cartridge is fully “used up”; in others, the water tastes different before the indicator changes. Trust the schedule, but also pay attention to the pitcher itself.
Signs your filter may need changing include:
- Noticeably slower filtration
- Persistently bad taste or odour in the water
- A filter indicator showing replacement is due
- The cartridge has been used beyond the recommended lifespan
If you’re using the pitcher for better-tasting water, an overdue cartridge is mostly a quality issue. If you’re using it with concern about contaminants, an overdue cartridge is a bigger problem. The filter can only do what it’s designed to do for a limited time.
How to clean the Brita Cube pitcher properly
Regular cleaning matters because pitcher filters combine water, plastic parts, and daily handling. Even when the water looks clean, films and residues can build up over time. A clean pitcher is not just about appearance; it helps maintain taste and reduce the chance of bacterial growth.
For routine cleaning, wash the pitcher, lid, and reservoir with warm water and mild dish soap. Use a soft sponge or cloth. Rinse thoroughly so no soap remains. Most Brita components are not meant for aggressive scrubbing, and scratched plastic is harder to keep clean.
A useful routine is to clean the pitcher every one to two weeks, or more often if you notice slimy residue, cloudiness, or any off smell. If you use the pitcher heavily, a quick rinse is not enough. Give it a proper wash.
For deeper cleaning, you can use a diluted vinegar solution on the non-filter parts if recommended by the manufacturer. Never place the cartridge itself in cleaning chemicals. The filter medium is designed for water, not for soaking in disinfectants.
Pay special attention to the spout, lid edges, and reservoir corners. These are the places where buildup likes to hide. As with many household water devices, the awkward little seams are where neglect accumulates.
What to avoid when cleaning
A few cleaning mistakes can shorten the life of the pitcher or the filter:
- Do not wash the filter cartridge with soap, bleach, or vinegar.
- Do not use boiling water.
- Do not put parts in the dishwasher unless Brita specifically says they are dishwasher-safe for your exact model.
- Do not use abrasive pads that can scratch the plastic.
- Do not store the pitcher in direct sunlight for long periods.
Heat and UV exposure can degrade plastic over time. They can also make the pitcher look old before its time, which is not ideal if it spends its life on the kitchen counter trying to look trustworthy.
How to tell if your filtered water is still okay to drink
Most of the time, a Brita pitcher that is used correctly produces clean, pleasant-tasting water. But if the water smells strange, looks cloudy, or tastes worse than expected, don’t ignore it. Start with the basics: check the filter age, wash the pitcher, and refill with fresh tap water.
Cloudiness can sometimes be caused by tiny air bubbles, especially right after filtering. That is usually harmless and disappears after a short time. Persistent cloudiness, however, is worth investigating.
If you are relying on the pitcher because your tap water has a known contamination issue, appearance and taste are not enough to judge safety. Some contaminants cannot be detected by smell or flavour. This is where pitcher filters have a clear limitation: they are convenience devices, not diagnostic tools.
Does a Brita pitcher help with PFAS?
This is where careful reading matters. Many readers on a blog like this are not just trying to improve taste; they are concerned about chemical contamination, including PFAS. Standard pitcher filters are not automatically designed or certified to reduce PFAS. Some specialised filtration systems can reduce certain PFAS compounds, but the performance depends on the media, contact time, certification, and the specific chemicals in your water.
If PFAS reduction is your goal, check whether the filter has an independent certification for PFAS reduction and identify which compounds were tested. “May help with contaminants” is not the same as verified reduction across the PFAS family. That distinction is critical because PFAS are persistent, chemically diverse, and often present as complex mixtures.
For households in areas with suspected PFAS contamination, a pitcher can still be useful for basic water treatment and convenience, but it should not be treated as a complete solution unless the product claims are backed by credible certification. When the stakes are long-term exposure and health risk, vague promises are not good enough.
How to make the pitcher last longer
If you want your Brita Cube to stay effective and hygienic, consistency is the key. Small routines beat occasional deep cleans.
- Keep a spare cartridge on hand so you can replace it on time.
- Rinse and wash the pitcher regularly instead of waiting for visible buildup.
- Store it in the fridge when possible to slow bacterial growth.
- Use the filtered water within a reasonable time frame.
- Reset the filter indicator whenever you change the cartridge.
It also helps to use the pitcher as intended. A filter pitcher is not a sink-side holding tank for water that will sit for a week. The more often it is refreshed, the better the water quality tends to remain.
Common problems and what they usually mean
If filtration seems slow, first check whether the cartridge was properly soaked or rinsed before use. A poorly prepared cartridge can start out sluggish. If it was installed correctly, the next likely cause is a filter that is nearing the end of its life or a very fine sediment load in your tap water.
If the water tastes off, clean the pitcher and try a fresh cartridge. Persistent taste issues can also reflect changes in the municipal supply rather than a problem with the pitcher itself.
If the cartridge leaks or sits loosely, remove it and reinstall it carefully. A poor seal can bypass filtration altogether, which defeats the point. No one wants “filtered” water that has taken the scenic route through a gap in the reservoir.
A simple maintenance routine that actually works
If you want the shortest possible version of this manual, here it is: rinse new filters properly, use cold water, keep the pitcher clean, replace the cartridge on schedule, and don’t let filtered water sit around for too long.
That routine may sound basic, but water treatment often is. The difference between a pitcher that performs well and one that becomes a nuisance usually comes down to those everyday habits.
A well-maintained Brita Cube can be a practical way to improve drinking water taste and reduce some common impurities. Just keep in mind what it is, and what it is not. For routine kitchen use, it’s convenient. For persistent contaminants, especially PFAS, it should be viewed as one part of a broader water strategy, not the final answer.
If you’re using a pitcher filter, the real secret isn’t a complicated technique. It’s staying on top of the basics so the filter can do its job quietly in the background, which is exactly what a good water filter should do.